
Anyways, one of my readers asked me to do a review on HR lipsticks since I have a bunch of them (all are gifts by my friends from Japan) . Sorry gurl, if it took a long time before I was able to do this review..I was quite distracted by my Lancome lipsticks these past weeks hehe :)
Here's my review:
PROS
- pretty colors to choose from and majority of them are very weareable for any skin tone
- color is lasting on the lips
- has a sleek packaging..since it is shiny, you can use it as a mirror whenever you want to do touch ups
CONS
- not available locally
- very obvious glitters when applied to the lips
- since it's long wearing, it makes my dry lips drier (so make sure to put a good moisturizing lipbalm underneath to prevent chapping)
- this does not apply smoothly on my lips unlike my Lancome lipsticks
Over-all Rating: 3/5 - Although I love the colors and staying power, I'm more after to the moisturizing properties of lipsticks.
Here's a shot of one of my HR lipsticks..I used this today for my FOTD..Color is so pretty on the lips ^_^

 Very cute right? I just hope it's more moisturizing..This is the main reason why I rarely use them..anyways, I'll try using different lipbalms underneath to see which one works for this lipstick coz I do love the color :)
oOo
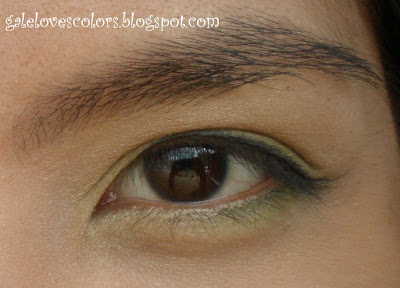
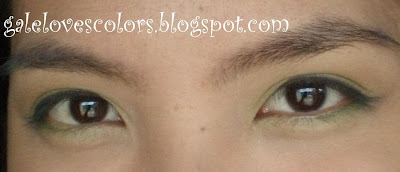
Now, for my FOTD..I was attracted to the greens and yellows of the Coastal Scents 88 palette so I decided to do a yellow-green look for today ^_^
 FACE
FACE- Innisfree Trouble Care BB Cream
- Ellana Sheer Velvet Primer in White Chocolate
- Meow blush in Cat Got Your Tongue
- Dayna's Minerals Glow in Violet Vesper
* all face products are applied using a stippling brush
LIPS
- Venus and Mars emu oil lip balm
- HR lipstick #44

 EYES
EYES- Mary Kay Signature Concealer in Ivory
- Ellana Minerals concealer in Awake
- MAC Paintpot in Painterly
- Coastal Scents 88 Matte Palette (green, yellow, yellow-gold and gold)
- Ellana Minerals MPM in Ethereal as eyeliner (applied wet using Aromaleigh eyeliner sealant)
* I did not use any mascara because I hate removing them haha ^_^

^ This is the inspiration for my look today. A mint green hoodie T-shirt dress ^_^
I hope you all liked it! Till next time. Bye! :)

 Let's start with the base. I used Innisfree Trouble Care all over my face. I applied it using my finger tips. Don't forget to conceal the areas that needs to be concealed so that we can achieve a flawless canvass.
 Now, let's do the eyes. Apply your eyeshadow base of choice to help your shadows adhere to your eyelids and give a better color pay-off. I used MAC paintpot in Painterly.

 Apply the pink eyeshadow with dabbing motion all over your lids until crease. It should look like this:
 Get your fluffy blending brush, I'm using my MAC 217 brush, and pick up an orange color. This is the orange beside the pink shade from the CS palette.
 Apply it on the crease, overlapping with the pink, using a wiper motion. Don't forget to blend, blend, blend! You can retouch the pink and the orange until you achieved the intensity of the shade you want. Since I'm going to wear it out, I chose to make it subtle.
 Then using any fluffy brush you have, you can also use your flat shader brush for this, pick up a white eyeshadow for highlighting the browbone. This is the shade on the upper left corner of the palette. It is a matte white.
 Sweep the shadow on your browbone area and blend it with your orange crease color. Blending can help you achieve the flawless transition of the colors. You should not be able to see where each color ends and starts.
 This is how your eyes should look like now.
 Using your contour or pencil brush, I'm using Ellana contour brush, pick up a purple shade. This is the color just below the pink eyeshadow we used for the lids.
 Apply the purple on your lower lashline (3/4 from the outer corner).
 Apply it on the inner corners of your eyes and blend it.


 Curl your lashes once the eyeliner has dried already. I used my Shiseido eyelash curler for this step.
 Then apply your favorite mascara to help hold the curl of yuor lashes. I used Lancome High Definition mascara in black then removed excess products using a clean spoolie.
 Then if you have any fallouts or mistakes, just use a wet cotton buds to remove them. Once dried, apply a highlighter on your undereyes. I use Ellana Awake concealer and applied it using my Charm concealer brush.
 This also sets your undereye concealer so that it can last longer aside from making your eyes appear more awake.
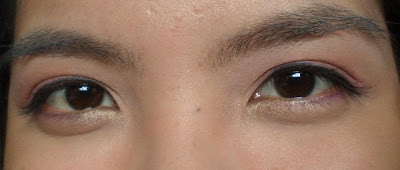 And this is our finished eye makeup!
 Now for the face:
 Then apply your blush of choice. I choose a pink one, Lumiere Ditt "O" blush, and applied it using a stippling brush, I used my Lumiere duo fiber powder brush because it has a smaller head than my MAC 187 so it fits my cheeks pretty well. Using a stippling brush also produce a "soft" blushing effect but you can also use your regular blush brush.


 And here's my outfit for today. I wore a long white tank top and blue jeans paired with baby blue flipflops. I also wore a hoodie on top since it's raining.
  Thank you for reading my very long post! Please suggest on what I can do to make my tutorials better. Tell me what you think. Post a comment! I'll be waiting for them :)


 I have tried Innisfree Trouble Care BB cream today and here's a shot of me wearing it alone.
 *with a different lighting*
 Here's my take on it: